Sign up for Lesson Plans, discounts & more!
Description of Materials for Parts of a Fossil Lesson plan
- Pictures for these lessons are line drawings in black and white.
- The pictures are identical except for one thing: each part is colored or highlighted in red to emphasize that part. For example, if you were teaching a lesson on Parts of a Tree, and you were looking at the definition for “trunk,” only the trunk would be colored in red. This helps younger children to focus on the single point that is being taught-chunking the lesson material into manageable pieces.
- There is one picture card for each part.
Fossil Labels
- Labels are the name of the part.
- There are as many labels as there are pictures.
Fossil Definitions
- Definitions are a description of the part. Definitions may also have the label (name) of the part as a heading on the definition card.
- Definitions are written for different reading levels.
- Word level reading is simply the name of the part or a “Label.”
- Sentence level reading may be one to several sentences that describe the part and its function.
- “Mute definitions” have the label cut apart from the sentence or paragraph to create another level of difficulty: matching the label to the picture and the definition.
A Discussion of “Parts of a Fossil” Lessons
Mastering vocabulary is a critical skill for learners of all ages. Whenever a student is faced with a new topic, there is always a series of associated vocabulary. It has been shown that the more extensive and familiar a student is with this vocabulary, the deeper the comprehension of accompanying reading. For the youngest students, frequent but diverse repetition is the key to mastery of the vocabulary. This is how the young student “studies.”
There are a series of exercises that the teacher may offer to the student in all work associated with learning vocabulary. We call these the “Parts of a fossil” Lessons. Depending upon the age of your students, these lessons may be completed in their entirely or selective lessons may be given. Remember, however, that the younger your students, the more important it is to include all the presentations so students have ample opportunities to gain the knowledge of the words in a comfortable, unstressed situation.
First Presentation: Observation
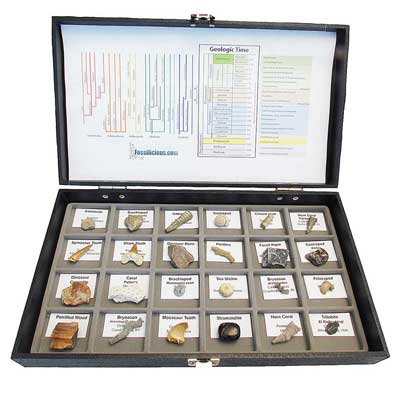
The initial presentation is a discussion in which the real fossil is observed. The teacher guides the discussion to include all the parts, knowing those parts which will be covered in the materials.
Second presentation: The Wall Chart
For this presentation, the teacher is prepared with uncolored pictures (one for each part), blank papers for writing the labels (enough for one for each part), and a red pencil for coloring in the part. If possible, have the real organism present for review of the observations.
The teacher asks the students about the parts of the fossil they observed in the previous lesson. As the students remember the names of the parts, a label is written and that part is colored in on a blank picture.
As each part is identified and the pictures and labels are prepared, they are glued on a long strip of colored paper to be displayed as a “Wall Chart of the Parts of a fossil” If the chart can be placed near the organism as a frame of reference of the other students, it makes a wonderful learning tool!
- Remembering that the students will have worked with the names of the parts, the emphasis is on recall of the purpose of the part. So the teacher might say, “Does anyone remember the part of the crinoid that helps hold the flowery part up off the bottom of the ocean floor? Can you find the picture that has that part colored in red? (Find the picture.) This part is called the stalk. (Help the student find and lay the label under the picture.)
- Remembering that the students have worked with the names at least three times prior to this, the teacher might say, “Can anyone find the picture of the stalk of the crinoid?” (Lay out the label. Find an lay out the picture under the label.) Do you remember how it helps the crinoid?
- Remembering that the student has had four to five different opportunities to associate the picture with the label and the spoken definition, the teacher might lay out the picture and say, “Does anyone remember the mane for this part of the crinoid’s body?” Once the name is found, lay the label under the picture and review the function of the part.
- This presentation is a discussion in which the teacher guides the students to create simple definitions for each part of the organism. The teacher might say, “We’ve been talking a lot about this crinoid. Let’s review the things we know about it.
- First, is the crinoid an animal or a plant? (It is an animal, eventhough it looks very much like a plant. Let’s write that down. (Write down a single sentence that expresses this information.)
- Where would you have found the crinoid when it was alive? (In the ocean or sea.) Let’s write that down:
- Continue with each part.
- When you have finished, staple the pictures and sentence definitions into a booklet. “Here we have a reference to use for the “Parts of a Crinoid.”
- Definition-Picture Matching: The teacher brings prepared pictures, definitions and control booklet to the lesson. This lesson is to introduce the material so the student can practice with it independently and use the control booklet to check the work after it is laid out.
- During the lesson, have one student at a time read their definition and match it to a picture. This demonstrates the process they will use for their independent work.
- The definition has a label attached so students who are less accomplished readers can match according to label.
- Students will have different methods, but encourage them to match all the pictures and definitions before checking with the control booklet.
- Mute Definition, Label, and Picture Matching: This fossil lesson is much like the last, except the label is separate from the definition so the student reads the definition, remembers the mane of the part and matches the label, then matches both to the proper picture. Students use the Control Booklet to check their matches.
Fossil Lesson Plans
Check out some of the Educational Materials for sale on our sister site fossilicious.com.

interested in more? If so, you may want to check out our other sites:
fossilicious.com - Our online fossil and mineral rock shop.
rocksandminerals4u.com - An educational site about rocks, minerals, and geology.
 |
 |
 |
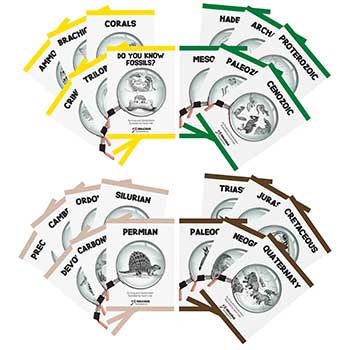
Geologic Time Geologic Time Line
Cenozoic Era
Quaternary
Neogene
Paleogene
Mesozoic Era
Cretaceous
Jurassic
Triassic
Paleozoic Era
Permian
Carboniferous
Devonian
Silurian
Ordovician
Cambrian
Archean Time
Hadean Time
Teachers Resources
Activities for Education and Fun
Earth Science Lesson Plans
Activities For Kids
Fossil Lesson Plans
Fossil Activities
Education Articles
Coloring Pages
Dinosaur Coloring Pages
Montessori Materials
Geology Club
Fossil Hunting
 |
 |
 |